Welcome Back! Here's a tour of how we decorated inside...
I started planning this party months ago, which gave me a lot time to keep my eyes open for party decor and a lot of time to make the decorations I wanted. Unfortunately, it gave me a lot time to spend money...next year, maybe I'll just go on vacation.
Step one of getting ready for the party included a good house cleaning scrub down! (My least favorite part :( but it was a must!) My sister had the brillant idea of removing the majority of the toys from the playroom. Our playroom is immediately to the right of our front door and the kids always love playing in there but they never seem to keep the toys in the room. It worked out great since we ended up having the photo booth there.
If you've read my blog before you know this lil momma is a working woman so I planned ahead this year and took of the two days before the party and the Monday after (just to recover.) The great news is I made it all the way until Sunday without logging on to the computer. Yeah for me!!! The Friday before was a great way to get the decorations started. My sister and brother-in-law were over all day helping which was wonderful!

I got these great paper lanterns from Shindigz for $1.99 each on clearance of course. The lime green one I bought at the dollar store. I hung them above our kitchen island and the dessert table. I love the look of paper lanterns but haven't used them because every time I see them they are so expensive and I never knew what size to get. (The yellow aand orange ones are 12" and the perfect size I think. Although the cute green one would be perfect for under an umbrella. I am excited to use these throughout the year. They were a great quality and I wish I would have ordered more!
I made a banner with my cricut machine and made a couple of wreaths using polka dot balloons that the dollar store had!
Here's a closer look. I love that they let almost look like they are made out of fabric!
I made two other types of garland throughout the party...circle garland and pennant banners which I love. Check out my earlier Pennant Blog here. The circle garland was so simple to make, just punch out cardstock circles using your circle punch which I took with me in the carpool for a few days. Crafting makes traffic a lot easier (Don't worry my husband drives and I ride passenger..it works out very well for me on our 1 1/2 each way commute!) This garland is cheaper than any you can find in the store and soo much cuter!

 We moved my kitchen table against the wall and set up the food table in the family room. Usually we have the computer on small table in there too but moved it out for the party and replaced it with a candy bar! So much more fun! Our family has had some run ins with pinatas in the past. A trip to the ER and a broken window later we finally gave up and just let the kids fill their own bag up. The adults find this idea way cooler too. But don't worry we still let them wreck stuff...afterall this was a construction party!
The Candy Bar ... At a yard sale a few weeks back I found these great cookie/candy jars. I got the whole box full for $15. It came with three large ones and six small ones! I simply added ribbon around the tops and made a small dump truck label. I purchased some digital clipart that I was able to use on the invitation and throughout the party. I loved tying everything in and loved making it.
Here's peering into the family room!

 The food table was covered in lime green polka dot material from Walmart for $2. We served most of the food out of dump trucks or buckets (new of course!) but when we set the food out I was in hostess mode so I'm trying to see if friends have more picks!This is of the before picture. I also added large shovels into the chip bags with the words DIG IN imprinted on them!
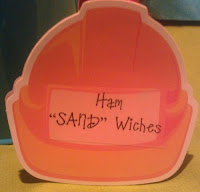
Throughout the planning process..I was looking for cute ideas to name the food items. Originally we were planning on making "sand"wiches but at the last minute decided to go with the traditional hot dog and hamburger barbeque. We had sides of "Corkscrew" Pasta and Bolder Salad (Potato Salad) Jello Salad (Concrete walls) and Fruit Sledgehammers (Fruit Kabobs). For Appetizers we had "Demolisher" Veggies, "Wrecking" Meatballs, and a few varities of Dry wall (Chips) and Concrete Dip.
 I found these great hard hat die cut outs at the dollar store ($1 for a pack of 25 and used them for both good box tags and food tags, I just printed the names of the different foods on to clear labels and added them to the decal. For the food tags, I glued two together and added a small piece of cardboard in between so they would stand, it was a great finishing touch! I also made a small garland with them although I didn't end up using but it was super cute.
 We also hung a Present Unloading Zone sign from the ceiling so guests would know where to place the gifts. I printed it out on photo paper and it looked great and shiny!
Coming up tomorrow... Part III The Dessert Table

 My aunt offered to purchase some construction hats from Oriental Trading Company and I was tickled when the box showed up with not only traditional yellow but pink hats as well. I added a label that read Drew's Crew and they were set. We also picked up some foam hammers from Target's dollar bin. The boys had so much fun getting them wet and attacking each other. We also picked up some tool belts from Home Depot and some construction vests also from Oriental Trading Company. Any crew member that rode the crane had to wear the gear and they LOVED it. (So did I!)
 To help quench our guest's thirst my husband built a roach coach. We added aluminum on the roof but painted the top gray so it wouldn't be as hot. I printed roaches onto clear labels and then added them on for an extra effect.
  This was my favorite part of the whole party. While searching for ideas, I found these great ideas for wrecking ball set-ups. They were a basketball wrapped in black fabric and on a string usually hung from a tree. I loved the idea immediately and knew I wanted to do it. When I told my husband he and my brother-in-law immediately wanted to build a moving working crane and that's exactly what they did. I'll post the tutorial coming soon but they built a frame on a lazy susan type of material. The kids were able to move the wrecking ball back and forth and knock down the brick wall. To make the brick wall I wrapped several sizes of boxes in red wrapping paper and used brown paint and a sponge to make the bricks. I love the way it turned out!


